November 28, 2016
How to Make Your Own Gift Basket
We’ve all faced the gifting dilemma before. You’ve been invited to the extended family holiday party and need gifts for your Uncle Rich and his entire family that you haven’t seen in 5 years. So, what should you do? The answer is simple. A well-crafted, homemade gift basket not only makes the perfect present for a group of people, but it shows that you put time and effort into the gift.
From holidays to birthdays and house warmings to anniversaries, gift baskets always make a great selection. The key is learning how to build just the right one for the occasion. If you’ve never made a gift basket before, the task can seem quite daunting. Lucky for you, our packaging experts are here to help. Check out the video below for tips and techniques. Then it’s time to put your new-found skills to the test!
How to make the perfect homemade gift basket in 6 easy steps
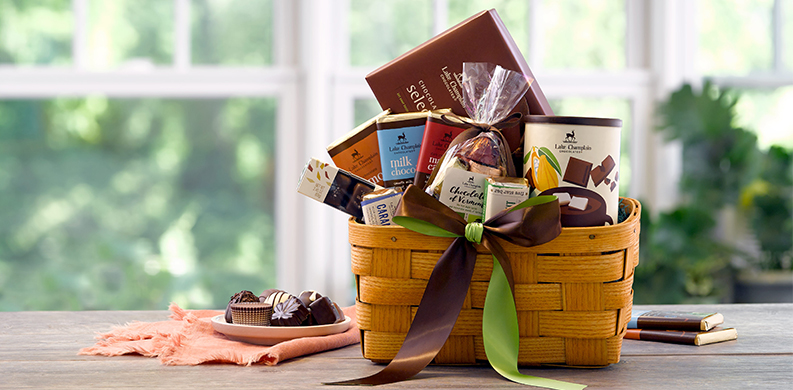
1. Choosing the right gifts.
Don’t know where to begin. Choose one item that you know the recipient(s) will enjoy. (Hint: everyone loves a little gourmet chocolate!) Then build a theme from there. It can be a color theme or it can be activity based. For our basket, we decided to focus on the theme of “a cozy slope side evening” and included everything you need to make a mug of hot chocolate. We also added some delicious Vermont truffles for the recipients to enjoy. Our basket incorporates red color accents, which helps complete the cohesive look.
2. Picking your basket.
When it comes to picking a container, go as small as possible. We recommend choosing a size that will just barely fit all of the items you have picked. This ensures that your basket looks full and overflowing with gifts.
3. Gather your materials.
To complete your basket you will need the following supplies: the gifts, a basket, filler, a cellophane bag, wide ribbon, scissors, and a gift tag (optional).
4. Stuff the basket with filler.
Fill the bottom of your basket with shredded paper, grass, or tissue paper. This allows you prop up your gifts so that they can be seen over the rim of the basket and also acts as a stabilizer to help hold your gifts in place.
5. Artfully arrange your gifts.
Place the largest items in the back of the basket. Arrange the items so that everything can be seen. Don’t be afraid to nest item together, such as placing a marshmallow gift bag inside a mug. Adding a couple smaller items throughout the basket, such as a whisk, gives your basket texture and a sense of thoughtfulness.
6. Complete the look.
After you are done arranging the gifts, carefully place the basket inside a cellophane bag. Gather the top together and tie closed with a ribbon bow.
Looking for more helpful gift-giving tips? Check out our video and guide on how to tie the perfect bow with ribbon. After all, no present is complete until it is topped with a beautiful bow.