November 26, 2021
Share:
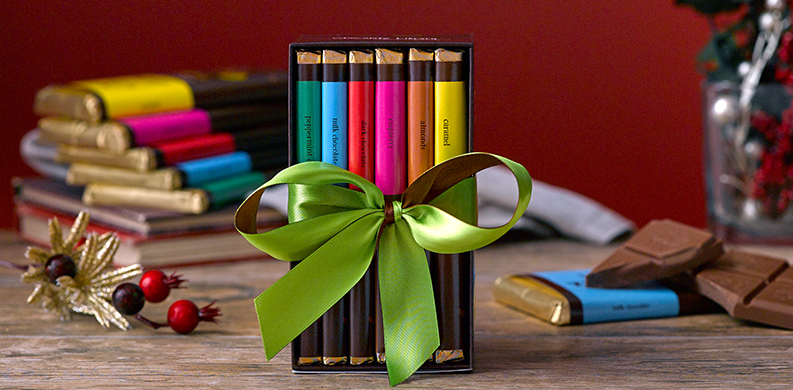
How to Tie the Perfect Gift Bow with Ribbon
It’s that time of year again – to make your list and check it twice. Then you are off for the holiday shopping extravaganza. There is a certain sense of satisfaction that comes from finding just the right piece of jewelry, toy, or chocolate gift. But, buying the gifts is only half the battle. Now you are faced with the task of wrapping the present and the pressure is on, because when it comes to gift giving, presentation is everything. A beautifully wrapped present is a delight to behold.
At our Vermont chocolate factory, we know a thing or two about creating an elegantly packaged gift box. Our professional ribbon-tiers (yes, we have people who are dedicated to tying gift bows) are here to share their expertise. Check out the video below for tips on how to tie the perfect bow and you’ll be well on your way to putting the finishing touches on your gifts!
How to tie the perfect bow with ribbon
Step 1: Assemble your supplies. Picking the right ribbon can make all the difference.
Step 2: Measure the ribbon. You will need twice the length and width of the box and a couple extra loops for the bow. (A long ribbon length will allow you to have a larger bow.)
Step 3: Place the middle of the ribbon in the center of the box, oriented across the shorter of the two sides.
Step 4: While using the table for support, cross the ribbon underneath the box. Slightly twist the ribbon so that you can now position the ribbon across the longer side.
Step 5: Wrap the ribbon around to the top of the box and feed the end under the ribbon on the box.
Step 6: Tie the ends together in a knot. This will secure the ribbon around the box, without having to have someone else hold it tight.
Step 7: Make sure your knot is centered on the top of the box and then tie the bow like you would on a shoe. Pull tight.
Step 8: Adjust the bow as needed to give volume to the loops.
Step 9: Trim the ends of the ribbon to the desired length. Cutting at an angle from each side to the center of the ribbon adds a decorative touch.
Step 10: Sit back and revel in your beautifully packaged gift.
Looking for some other helpful gift giving tips? Check out our video and guide on how to make your own gift basket for a memorable customized gift your recipient is sure to love!